|
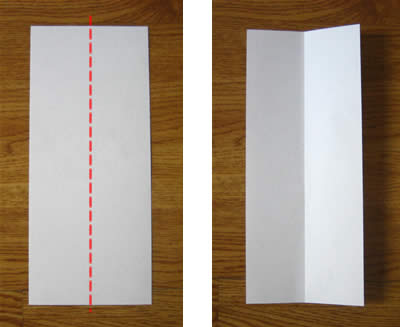
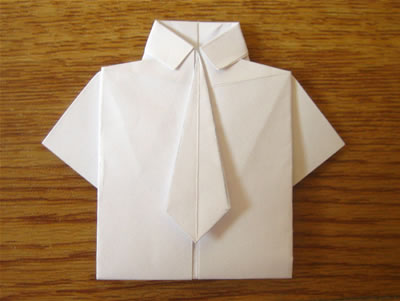
这个衬衫加领带需要比较长的钞票才能做出比较好的效果(如美元),小编试图用十元RMB折,发现衬衫比例不美,而且最后一步比较难做到..但是还是能折出来就是..大家可以试试.Step 1:Fold the bill in half lengthwise, then unfold.将钞票竖着对折~
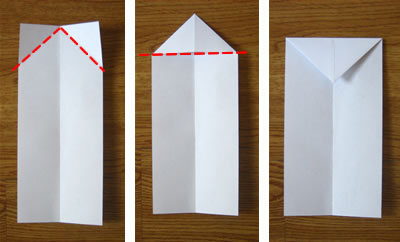
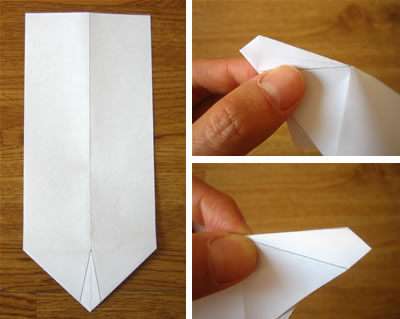
Step 2:Fold the top two corners to the center crease, as if you were making a paper plane. Then, fold down the triangle that you#39;ve created.这个很清楚不用解释吧,按下图红线折~
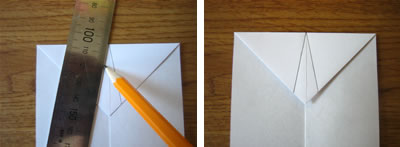
Step 3:Use a pencil and ruler to sketch in the shape of a necktie onto the triangular flap. You can make the tie as wide or skinny as you like, so long as the lines you draw meet in a point at the top edge of the paper.用钱币画个领带的样子,粗细都可以自己决定~
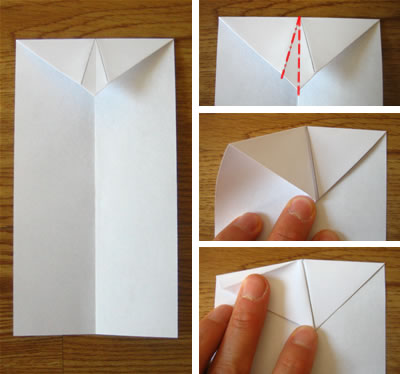
Step 4:Unfold the triangular flap, so that the paper looks like the left panel below. Then make creases along each of the pencil lines you drew in step 3.展开第二步向内折的三角,然后沿着铅笔画好的痕迹折出折痕
Step 5:Fold the triangular flap back down, so that the paper looks like the left panel below. ow fold the necktie in half (top right panel). This will make the top left edge of the paper lift up (see middle right panel), so squash that top left edge flat again, making a new crease in the process (see bottom right panel).这一步骤比较难描述,再次将三角往下折,并沿着之前的折痕将两个铅笔所画两条线的折痕重合.并压平整.为下一部准备.
Step 6:Open out the necktie again by folding along the crease shown below.按下图将上图所示铅笔线重合处沿中线往左折,折出半边领带.
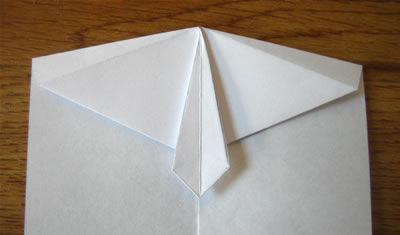
Step 7:Repeat steps 5 and 6 on the other side. The paper should now look like this. You can see the necktie already!重复前两步将领带折出来,你会发现肩膀处拉低了.
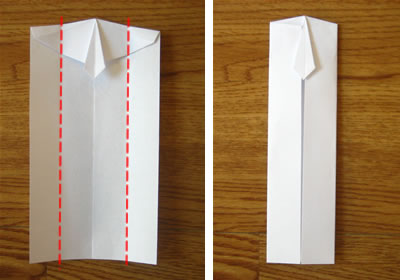
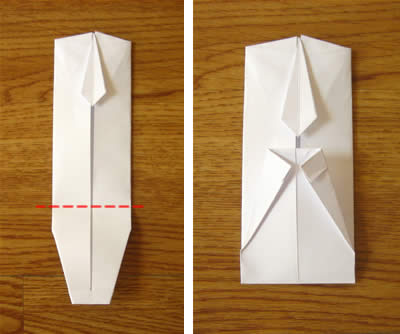
Step 8:Fold the left and right hand edges in to meet the center line.将左右两边分别沿着红线向中间折.
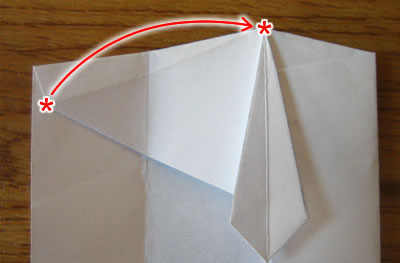
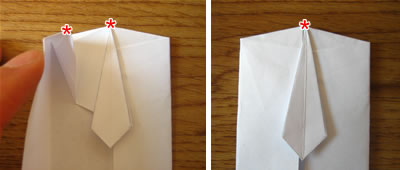
Step 9:On the left hand side, undo the fold you made in step 8. Then redo the fold, but this time make left *-corner meet the right *-corner.展开左边,再往中间折一次,这一次要将下图所示的两个点重合..
Here#39;s another view to make it a bit clearer:示范步骤~
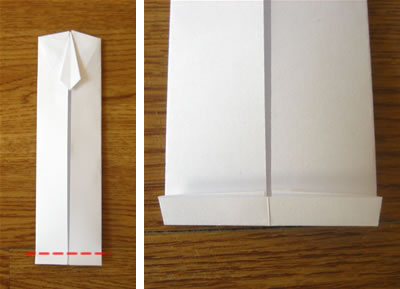
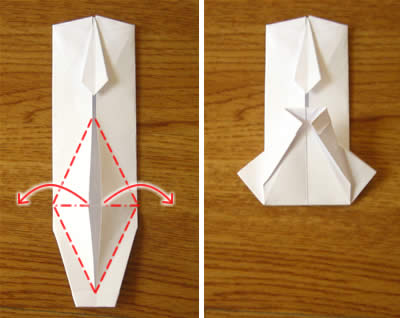
Step 10:Repeat step 9 on the right hand side. Then fold up the bottom edge about 1/4' (about 1/2 cm) from the bottom, like this.对右侧也重复上一步~并将下端正面向上折出大约0.5厘米的边缘(做领子用的)
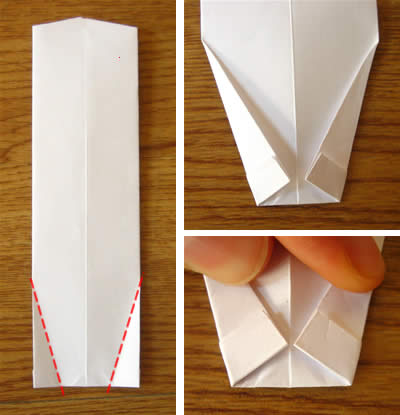
Step 11:Turn over the paper. Now we#39;ll make the collar of the shirt. Fold the bottom two corners in at an angle to meet the center line. See how it looks like a shirt collar, but upside down?将纸币翻到背面,按下图沿着红线折出领子
Step 12:Turn over the paper, so that the necktie is on the top again. Fold up the bottom so that the collar almost reaches the necktie. It should be about 1/8' (3 mm) short of touching.将纸币翻转回来,将地步正面朝上折,让领子距离领带大约3毫米的距离.
Step 13:Now we#39;ll make the sleeves of the shirt. Undo the fold from step 12. Then redo it, but this time pull the two flaps shown outward. See how they stick out to the side? They#39;ll be the shirt-sleeves.展开,根据上一步的折痕将两边翻开折出袖子,如看不懂(请参考【纸币折纸教程】第一弹-- T恤第二种折法).完成图如右图
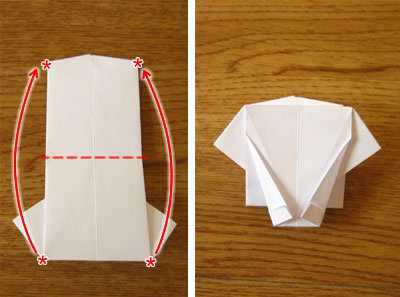
Step 14:Turn over the paper. Fold in half, so that the corners marked * touch each other.将纸币翻到背面,如左图所示两点要重合.
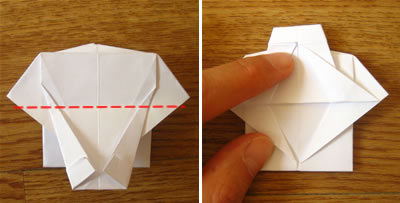
Step 15:Fold up the collar, so that it just peaks over the top of the shirt.将领子往上折
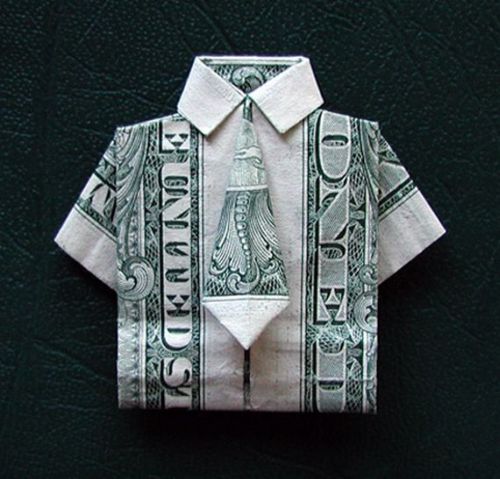
Finished!Hook the collar over the front of the shirt, and it should look like this:翻到正对面,领带那层塞到领子下面~完成!!
|
